How to add a new server
How to add a new server
Introduction
With RMON, you can add a server in order to install an agent on it and then monitor your server via the graphical interface: check the availability of TCP and UDP ports, network connectivity, HTTP status, and so on. The following is a step-by-step guide on how to add a new server.
Adding a new server: step-by-step
1. Go to the Admin area => Servers section and click Add.

2. Fill in the form:
- Name — your server name, which is displayed on all RMON pages;
- IP — your server IP address;
- Port — the port used for SSH connections, port 22 is used by default;
- Enable — check this box to display your server on all RMON pages. If you uncheck this box, the server will be hidden after it is created;
- Description — additional information for your server, if necessary;
- Credentials — credentials for SSH access;
- Group — the group your server will be added to.
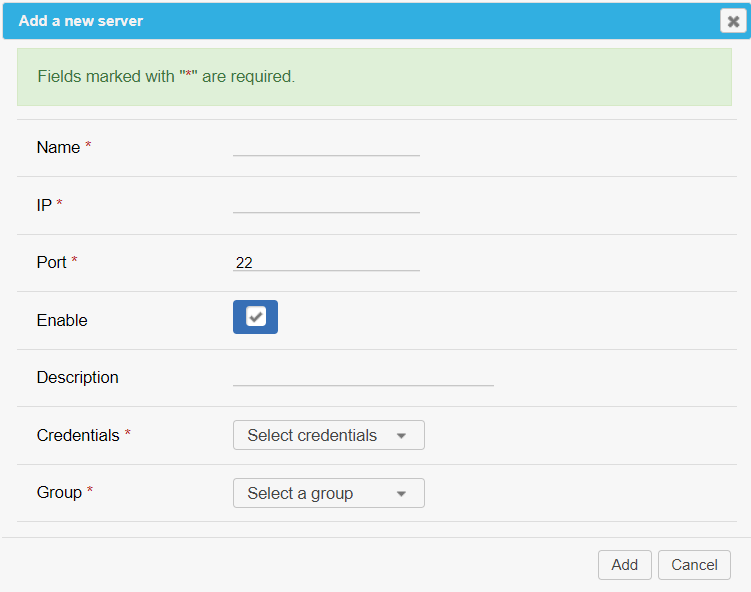
3. Click Add.
The server will be added to the Servers tab and to the group you have selected.
To check if the connection with the new server has been successfully established, click Check. If everything is OK, RMON will display the "Connect accepted" message.
Manage the server
Go to the Admin area => Servers section to see the list of all the servers that have been added. To manage a server, click the appropriate icon next to it.

These icons allow you to do the following:
- Review server history (for some subscription levels) and export it to Excel, CSV, or PDF;
- Check the information about your server, such as installed OS, RAM, CPU, network interface, etc;
- Quickly add a new server with the same parameters by cloning the existing one;
- Delete the server.