1. To create and assign a check to your agent, go to the Dashboard tab and click
Add check.
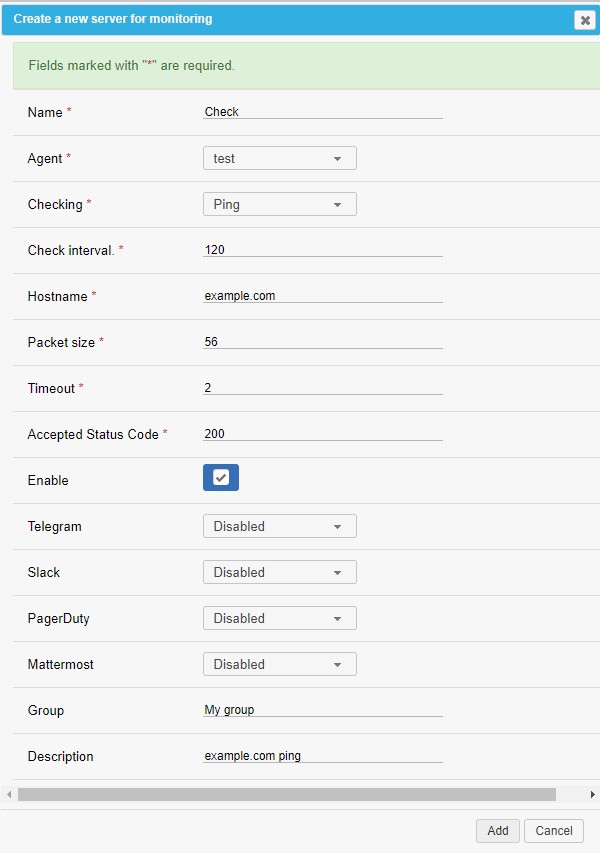
2. Fill out the fields:
- Name your check.
- Select the agent from the drop-down list.
- Enter the check interval in seconds.
- Specify the time in seconds to receive a response before the check fails.
- Set a status code that indicates the check was successful.
- Check the “Enable” box if you want to run the check immediately after creating it.
- Select the services to receive notifications.
- Group the check by entering a group name.
- Add a description.
- Select the checking type: DNS, Ping, TCP/UDP, or HTTP(s).
For DNS checks:
- Enter the hostname of the service you want to check.
- Specify the IP address of the resolver server.
- Enter the port that will be used for the check.
- Select the resource record type that you want to check.
For Ping checks:
- Enter the hostname of the service you want to check.
- Specify the packet size that will be sent to perform a check.
For TCP/UDP checks:
- Enter the hostname of the service you want to check.
- Enter the port that will be used for the check.
For HTTP(s) checks:
- Enter the URL of the service you want to check.
- Specify the response body that the agent should receive for the check to be considered successful.
- Select the HTTP method that will be used to run the checks.
- Specify the request body that the agent will send to perform the checks.
- Specify the headers that the agent will send to perform the checks.
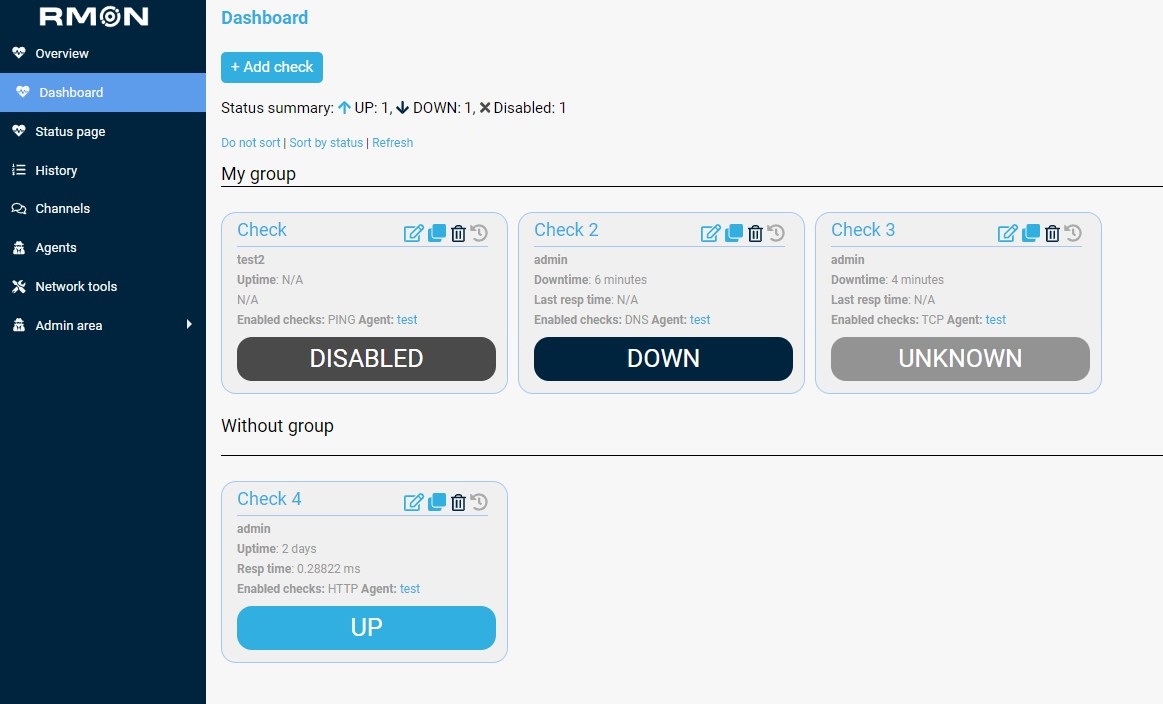
3. Click Add. The check will appear on the Dashboard page. If you haven’t specified a group, the check will be located in the “Without group” section.
There are four buttons to the right of the agent’s name: 🖉 — edit the check, 🗐 — clone the check, 🗑 —
delete the check, ↺ — view the check's alert history.
Each check shows its status: UP — the checks are running, DOWN — the checks are failing,
or the check parameters are incorrect, DISABLED — the checks are disabled, or UNKNOWN — the check parameters
are processing.
Go to TOP
Was this article helpful?